How to Make Your Own Square-Based Origami Bud
Designed by Jeannine Mosely
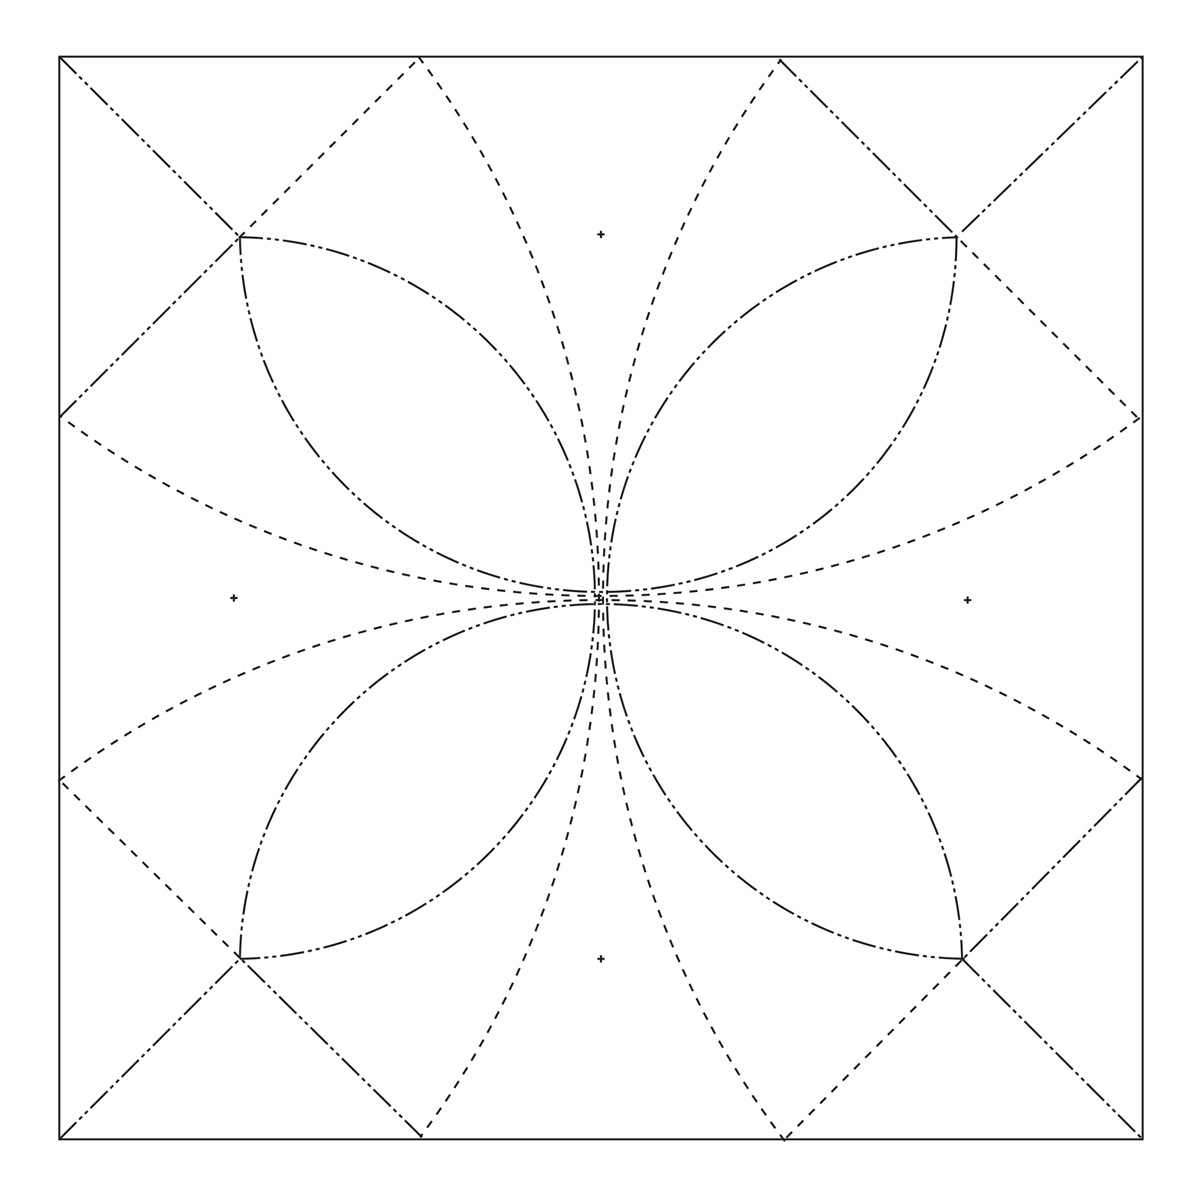
With just a pair of scissors, a scoring tool[1], and a little patience, you can turn a printout of the above image [print from this PDF] into a three-dimensional “bud” that looks like this:
To start, print this PDF onto a light card stock (70 lb “cover weight“ is ideal) and cut out the square.
Score each printed line firmly, but don’t press as hard as you can. Overscoring could cause the card stock to crack when you crease it. For best results, score on a flat, padded surface, like a newspaper or your copy of Cabinet.
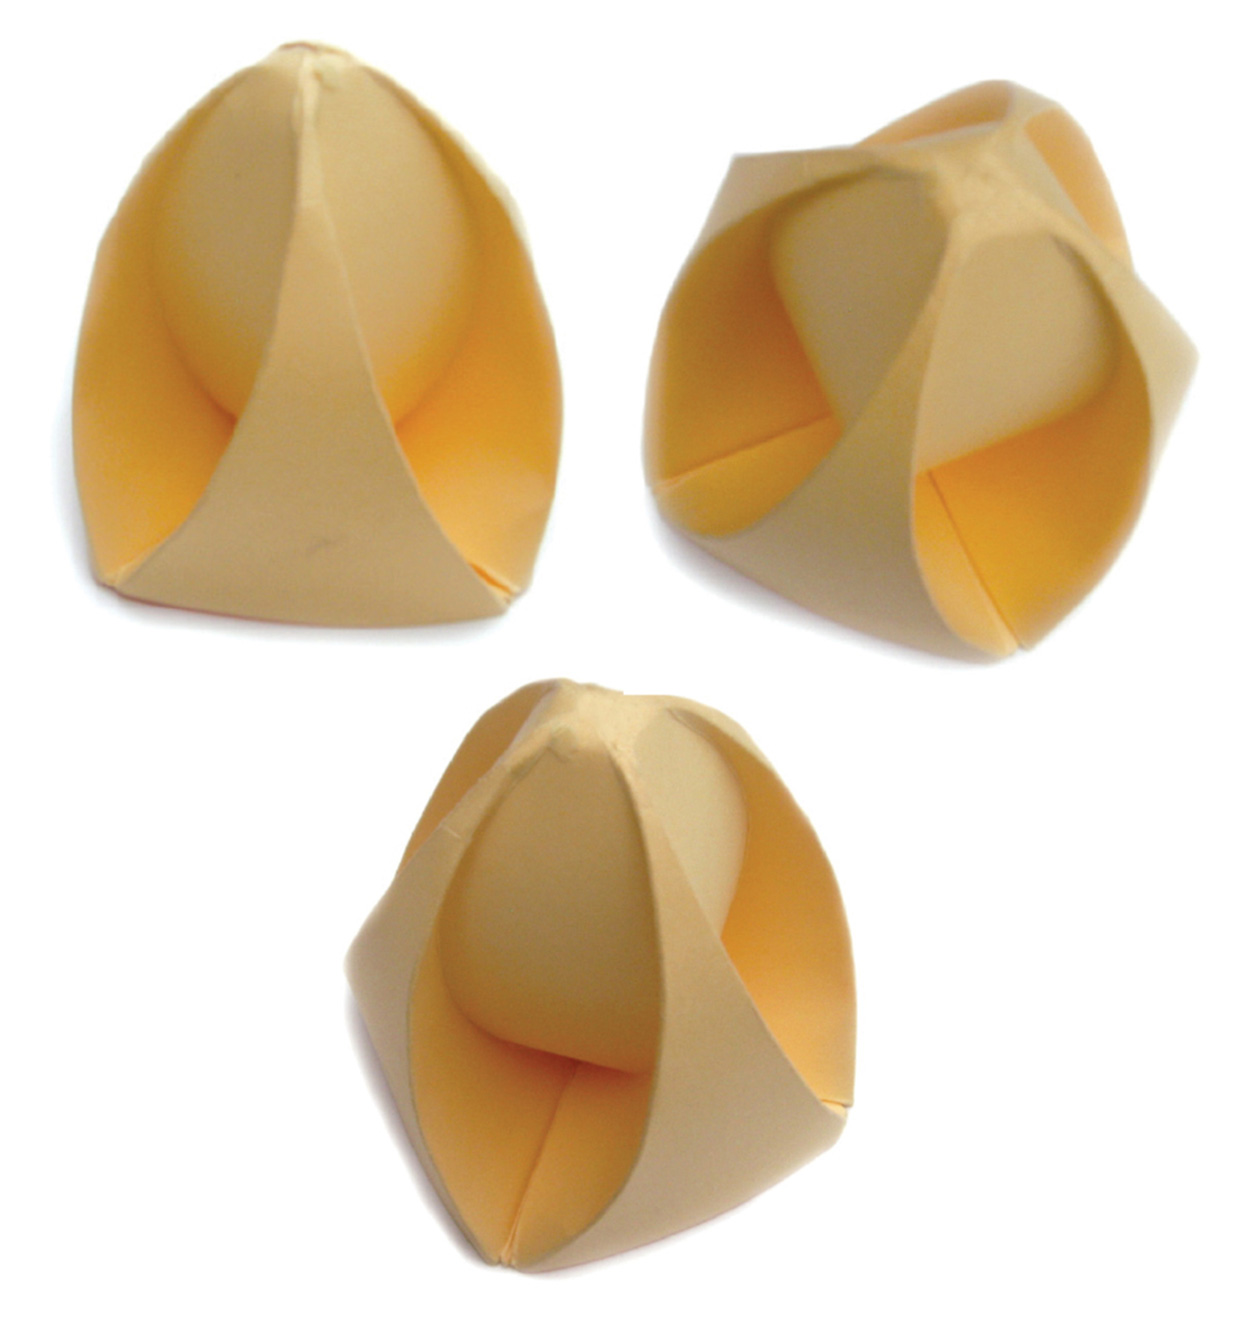
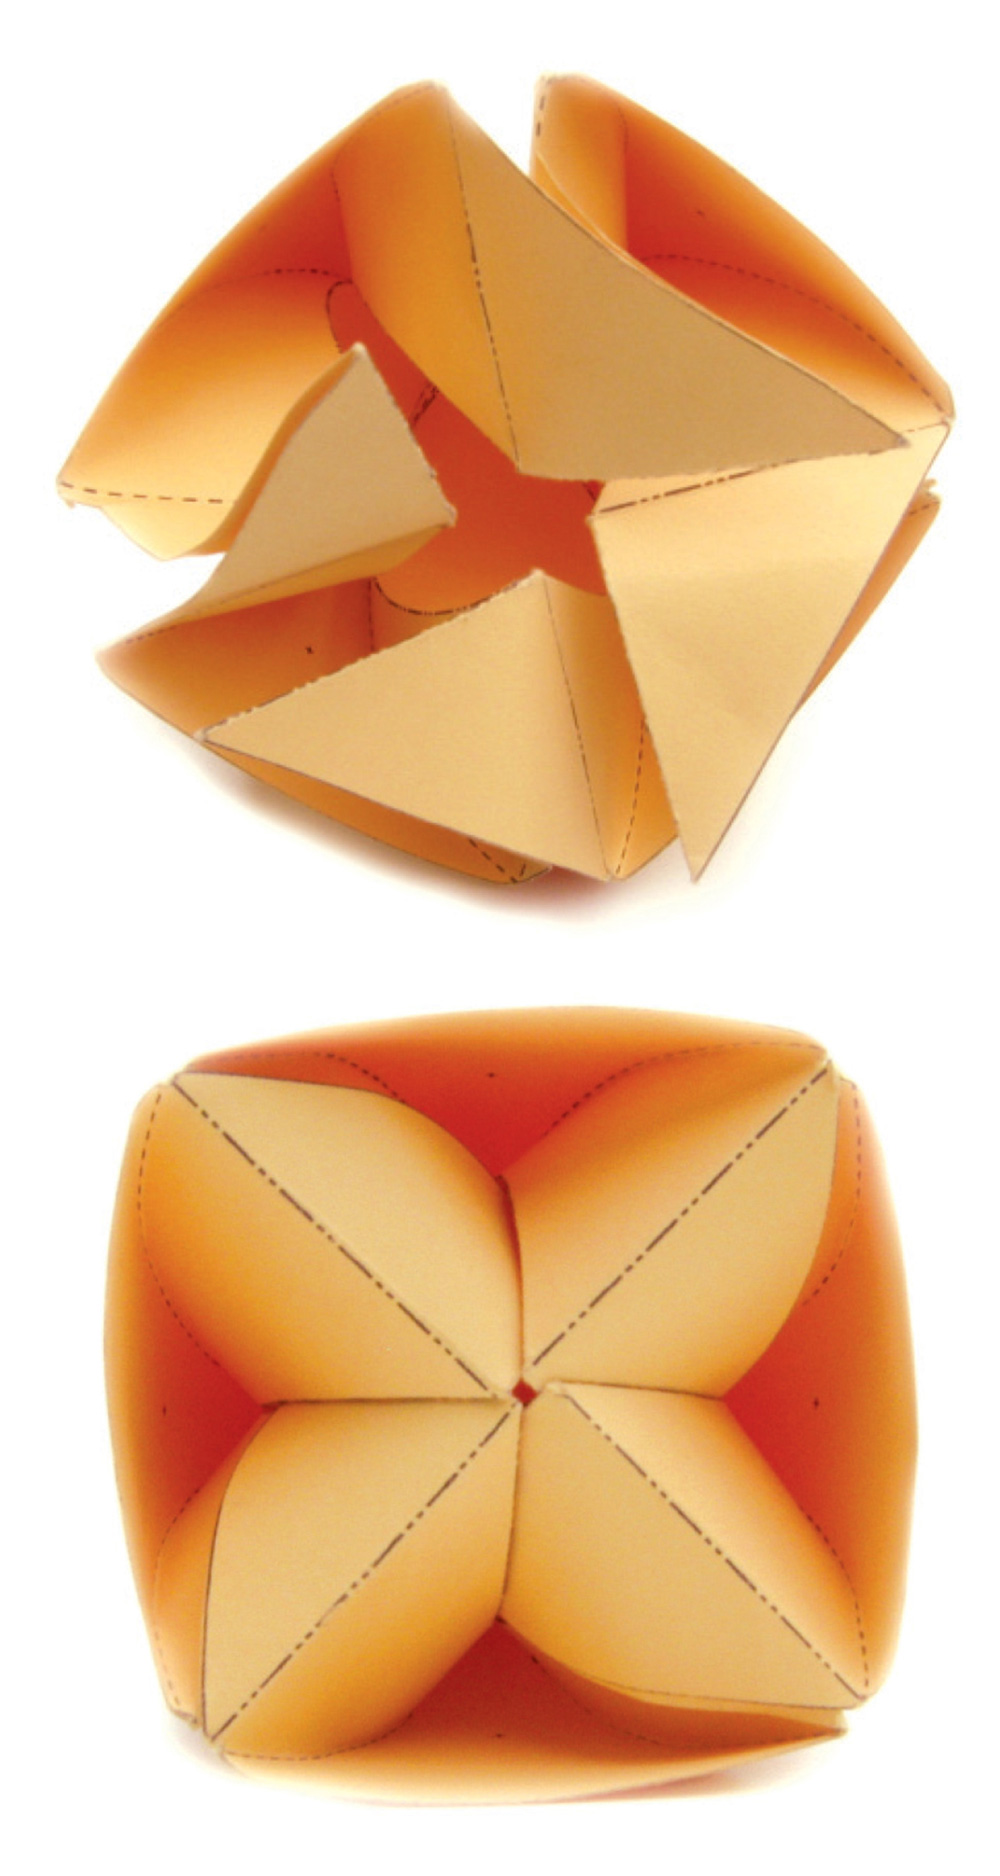
Next, begin creasing the scored lines, using the following photograph as a guide.[2] This is the trickiest step. It takes time and patience—at least fifteen minutes, probably—to coax all the curves into proper creases. You may have to work around the whole square a few times before your creases are defined and flexible.
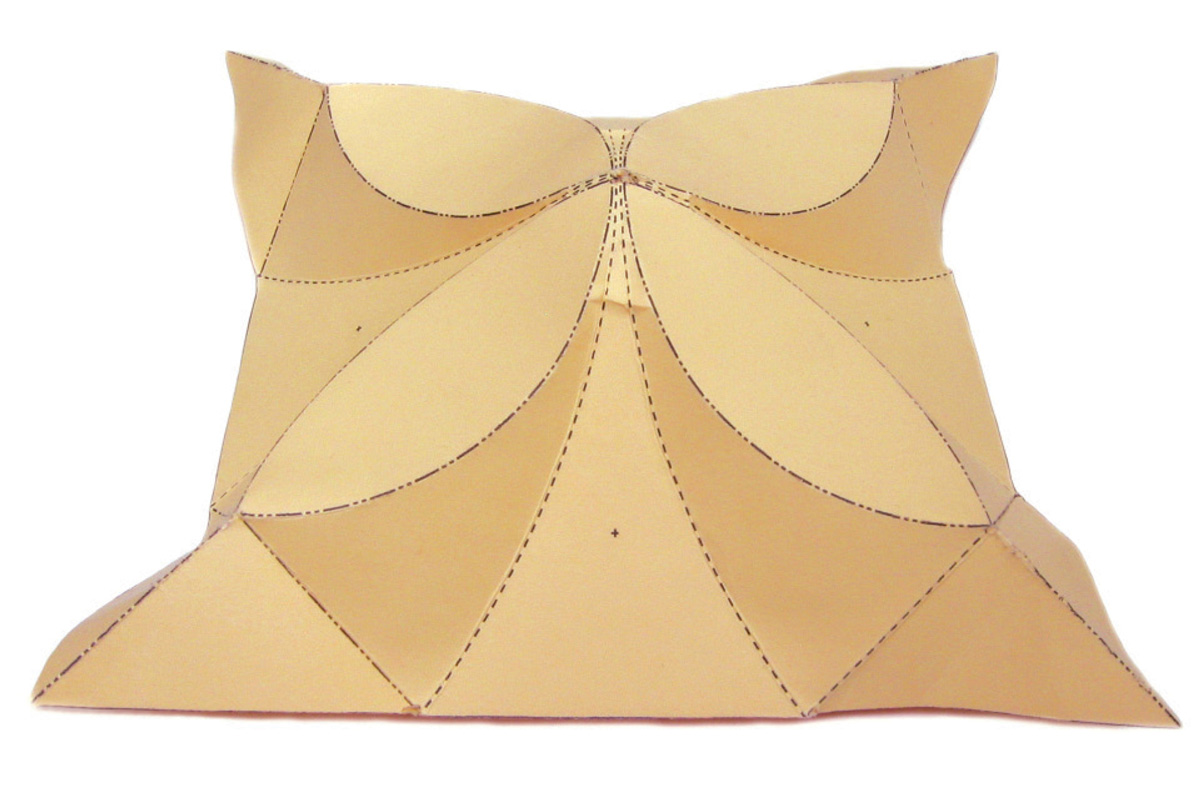
Next, bring the four corners of your creased square together. (The printed side should become the inner, “hidden“ part.) You will almost certainly have to encourage and refine your creases as you do this.
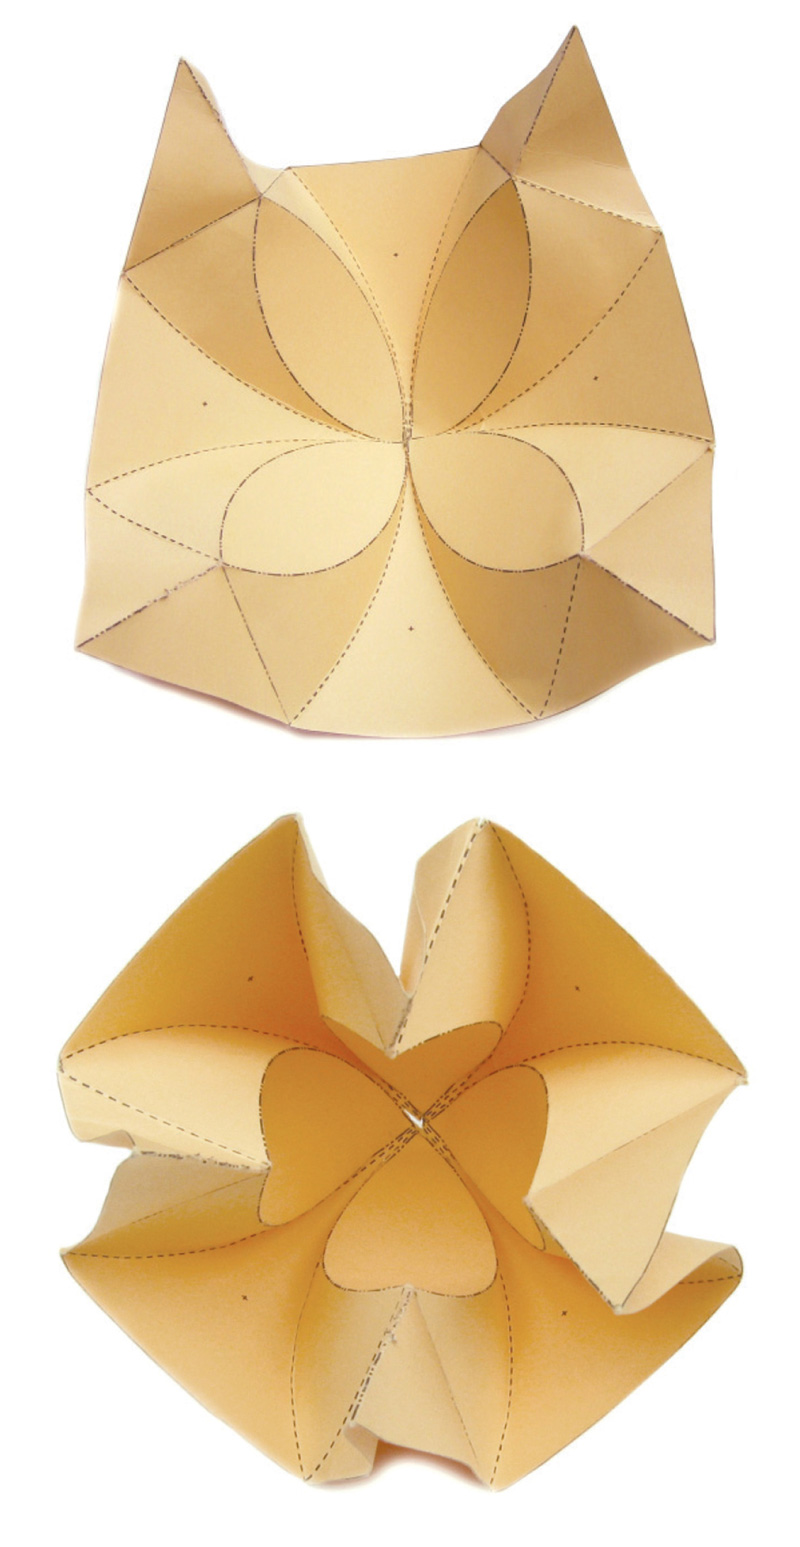
The corners of your square are now triangular flaps. To complete your bud, fold all flaps in a clockwise direction. Then, tuck each flap into the underside of the model. Properly tucked flaps will allow the model to hold itself together.
* This origami bud was designed by Dr. Jeannine Mosely, an electrical engineer who designs and codes geometric modeling software. Mosely is an expert on business card origami and minimalist origami, in which one is restricted to just four folds. She has constructed an entire alphabet—both upper and lower cases—of minimalist origami letters, and is currently completing a model of a level-3 Menger Sponge, the first three-dimensional fractal that mathematicians discovered. Dr. Mosely’s Sponge is composed of 66,048 business cards folded into 8000 2-inch cubes linked together. The construction, which now resides in Mosely’s garage, will be completed in the spring.
- Many origamists use an empty ballpoint pen for scoring. If you happen to have a bone folder or other round-tipped embossing tool, you could use one of these instead. If you have none of these things, you could try using a full ballpoint pen, since all your score marks will be hidden on the inside and underside of the finished object. But you’d have to be extra careful about fingerprints and smearing.
- Specifically: Note that there are two kinds of dotted line. All the “dash-dot-dot“ lines will crease to form “mountains.” The other lines—made of dots of consistent length—will crease to form “valleys.” The photograph illustrates how your square will look if you crease it according to these rules.
Spotted an error? Email us at corrections at cabinetmagazine dot org.
If you’ve enjoyed the free articles that we offer on our site, please consider subscribing to our nonprofit magazine, which includes unlimited access to all our archives.